Mac 版 Google Chrome の起動オプションを設定するにあたり、結構てこずったのでメモ。
Windows 版 Google Chrome の起動オプションは 「Chrome アイコンを右クリックしてプロパティ」で設定することができますが、Mac では Chrome アイコンを右クリックしてもプロパティに相当するものがなく、Windows のように簡単に起動オプションを設定することができません。
WEBで調べたところ Mac 版 Google Chrome を起動オプションつきで起動するには、ターミナルから Chrome の起動コマンドを実行したり、ランチャソフトを使用する方法が一般的のようです。例えば、ターミナルで下記のコマンドを入力すると、Google Chrome がシークレットモードで起動します。
open -a /Applications/Google\ Chrome.app/Contents/MacOS/Google\ Chrome --args -incognitoブラウザは日常的に使用しますし、家族も Mac を触ったりするので、できることならターミナルを使わず Dock から Chrome を起動したいものです。
よい方法はないものか試してみたところ、Automator というツールを使って Dock から起動オプション付きで Google Chrome を起動できましたので紹介します。
動作確認環境
- Mountain Lion OSX 10.8.2
目次
Automator を使ってシェルスクリプトをアプリケーション化
Automator を使用し、冒頭で紹介したコマンドをアプリケーション化して、Google Chrome をDockから起動できるようにします。
Automator を起動する
アプリケーションフォルダから、Automator.app を起動します。

起動すると「書類の種類を選択してください」と表示されますので、「アプリケーション」を選択します。
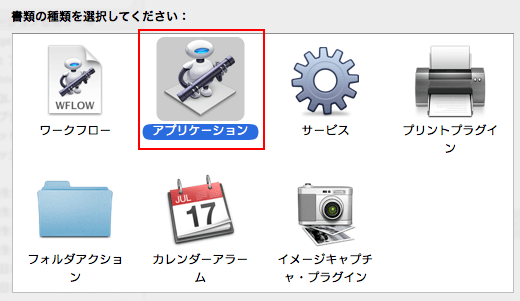
シェルスクリプトを実行 を選択
アクションの右側にある検索窓に「シェルスクリプト」と入力します。すると「シェルスクリプトを実行」が表示されますので、ダブルクリックします。
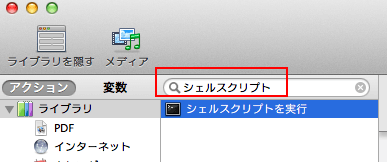
Google Chromeの起動コマンドを入力
シェルスクリプトを実行 ウィンドウにGoogle Chromeの起動コマンドを入力します。ここで起動オプションを指定します。

open -a /Applications/Google\ Chrome.app/Contents/MacOS/Google\ Chrome --args -incognito起動オプションは --args の後に指定します。上記の例は、起動オプションに -incognito を指定しています。-incognito は、シークレットモードで起動するオプションです。一字一句間違えずに入力するのは難しいので、上記のコマンドをコピーすることをおすすめします。
シェルスクリプトを保存してアプリケーション化
コマンドを入力したら、ファイルに保存してアプリケーション化します。ファイル > 保存 をクリックするか、command + S を入力します。
保存ダイアログが表示されますので、アプリケーションに名前を付けて保存します。今回は、「MyGoogleChrome.app」という名前にします。ファイルは管理しやすい場所に置いてください。私は書類フォルダに app というフォルダを作って保存しています。
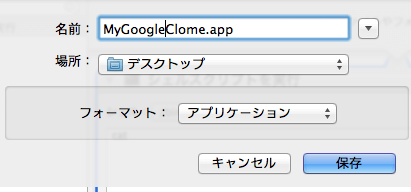
保存したアプリケーションを起動する
作成した MyGoogleChrome.app をダブルクリックして起動してみます。Google Chrome が「シークレットモードを使用中です」と表示されれば成功です。
保存したアプリケーションを修正する
うまく動作しなかったり、起動オプションを変更したい場合は、Automator から修正を行います。
Automator を起動し、「既存の書類を開く」ボタンをクリックして、MyGoogleChrome.app を選択します。
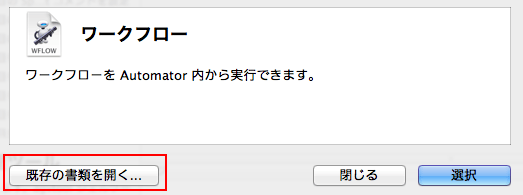
シェルスクリプト実行ウィンドウが開きますので、起動オプションを変更します。下記は、Chrome のキャッシュを RamDisk に置く場合のサンプルです。
アイコンを変更する
Automator で作成したアイコンはロボットのようなアイコンで味気ないです。Chrome のアイコンに変更します。アイコンは、インストールされている Google Chrome のアイコンをコピーして使用しますので、WEBからダウンロードする必要はありません。
Google Chrome のアイコンをコピーする
アプリケーションフォルダから Google Chrome.app を副ボタンクリック、「情報を見る」をクリックします。
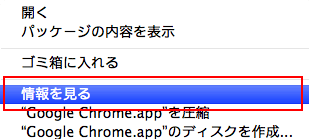
情報ダイアログが開きますので、左上の Google Chrome アイコンをクリックして、command + c (コピー)します。
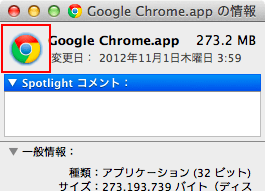
Automator のアイコンを Google Chrome アイコンで上書きする
次に、さきほど Automator で作成した MyGoogleChrome.app を副ボタンクリック、同じように「情報を見る」をクリックします。
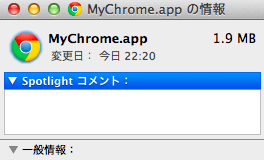
左上のロボットのアイコンをクリックして、command + v (貼り付け)します。
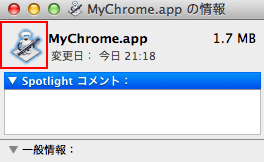
アイコンがロボットから Chrome に変更されます。
Dockに登録
MyGoogleChrome.app を Dock にドラッグドロップして登録します。オリジナルの Google Chrome は Dock から削除します。
